Simple Holiday Hats
by Ralph Dewey
The Balloon HQ Challenge for this month is a Christmas Holiday Hat.
Hats are always popular with kids and adults. This month I’ll show you how to make three holiday hats. The first two are classic hats that are easy to make. They’ve been around for a few years. I would gladly credit them, but I’m not sure who was the first person to come up with them. The third holiday hat is my design of Frosty The Snowman.
Santa Hat
You will need one white 2″ round balloon or a white 6″ heart. You will also need one red #260 balloon and one white #260 balloon. Inflate one of the white #260 balloons fully except for about 1/2″ and tie off the nozzle. Twist off a 3/4″ bubble and two 14″ bubbles and twist-connect the 3/4″ bubble at the end of the second 14″ bubble. Twist off a 3/4″ bubble on the nipple end of the balloon. Twist-connect it at the joint between the two 14″ bubbles.
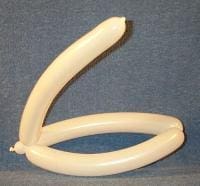
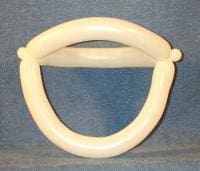
Inflate the red #260 balloon to 24″ and tie off. Twist off two 12″ bubbles. Tie a knot at the end of the inflated portion. The cut off and discard the extra balloon. Tie the ends of the red #260 to the ends of the white 14″ bubbles.
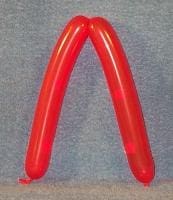
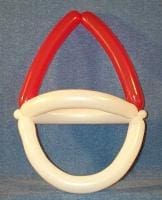
Inflate a white 6″ heart balloon to about 2-1/2″ so that it still looks round and tie off the nozzle. Tie it between the two red 12″ bubbles. The Santa Hat is complete.
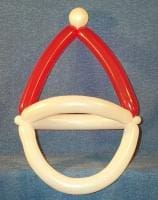
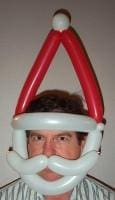
Option:
You can easily add a moustache to the hat from a section of white #260 balloon. Twist off two equal soft bubbles about 7″ each and curve them. Use rubber cement to glue the moustache in place on the balloon.
Reindeer Hat
The Reindeer Hat only uses three balloons, two #260 coco brown and one 6″ red heart balloon. Inflate both brown #260 balloons except for about 1″ and tie off the nozzles. Twist off a 3/4″ bubble on both nozzle ends. Overlap both balloons about 14″ and twist-connect them together. This forms the base of the hat.
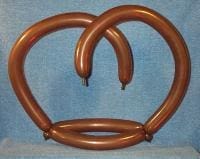
Twist the two brown balloons together about 10″ from the hat base. Fold the last 6″ of both balloons from the nipple end. Twist them in half. Arrange the nipple end to point upward and the loop to the side. See photo for details.
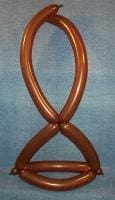
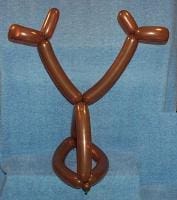
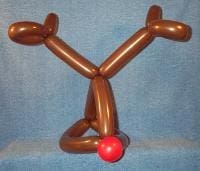
Inflate the red 6″ heart balloon about 2-1/2″ so that it still looks round and tie off the nozzle. Tie the nozzle of the red balloon to the front end of the hat. Tuck the 3/4″ bubble inside the hat. That completes the Reindeer Hat.
Frosty The Snowman Hat
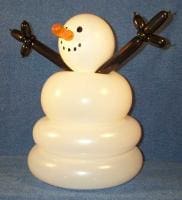
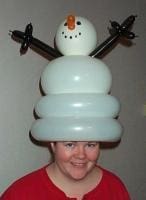
This hat uses rubber cement or Glue Dots® to hold it together. Therefore it is not as quick to make as the other two holiday hats. In addition to a black balloon marker and rubber cement, you will need two white 16″ round balloons, two white #350 balloons, one orange #160 balloon and two black #160 balloons. For the head, inflate one of the round balloons to about 6″ in diameter and tie off. For the torso, inflate the other round balloon to about 9″ and tie off the nozzle. Connect the two balloons together by making a large apple out of the torso balloon. That is, poke the knots of the balloons down into the torso balloon. Poke them all the way through to the other side (the nipple end) and capture both knots. Use a scrap of a #260 balloon to tie around the knots to help secure them. Now the two round balloons are connected together.
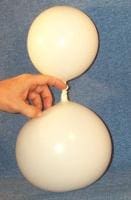
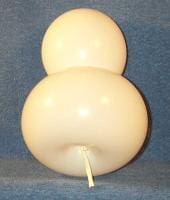
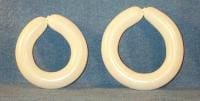
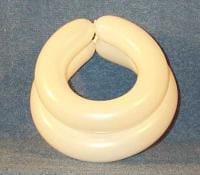
Now make the two loops which form the bottom section of the snowman. Inflate one of the #350 balloons to about 30″ and tie the ends together to form a circle the proper size of the recipient’s head. Make the second loop in the same way except about 15% smaller in diameter. Two loops are needed so that the hat will have a cavity and therefore sit on a person’s head properly. Glue the two loops together making sure they are centered.
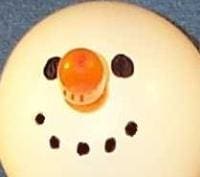
Inflate a small 3″ section of the orange #160. Tie a knot about 1/2″ down from the inflated section. Cut and discard the remaining balloon. This will be the carrot nose. Make a small apple twist on the nozzle end. The apple twist will give you a flat surface so that the glue will stick better. Glue the nose to the head balloon. Mark the eyes and mouth. Glue the bottom of the torso balloon to the smaller loop.

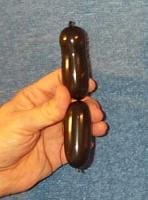
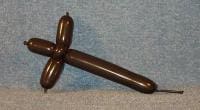
The make the arms, inflate an 8″ bubble of a black #160 and tie off the nozzle. Twist off a 2″ bubble and two 3/4″ bubbles. Ear twist the two 3/4″ bubbles. Tie a knot at the end of the inflated section of the balloon. Cut off the excess balloon, but leave at least 1″. Use the discarded balloon section to make a 4″ balloon length. It will be used for the snowman’s fingers. Twist the 4″ section in the middle forming two 2″ bubbles and twist-connect it between the two ear twists. This forms one of the arms/hands. Take the second black #160 and make another identical arm. Tie the two arms together and place them between the head and torso balloons.


This completes the Frosty The Snowman Hat.
Option:
If you want to add a little more detail to your snowman hat, you can add a balloon hat and scarf.
Baby Jesus in the Manger
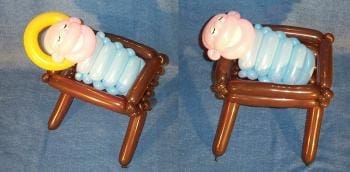
The real reason we celebrate Christmas is to be reminded of the birth of our Savior, Jesus Christ. As the saying goes, “Wise men still seek Him today.” Here is an idea for a Christmas scene that you might like to make for your church or use as a living room decoration. There are two versions shown, one with a halo and one without.
Fancy Holiday Hats
Here are some examples of holiday hats that I have made in the past which require more skill and effort.
