Bomb And Balloon Photographing
by Ralph Dewey
The Balloon HQ challenge this month is a bomb or similar comedy prop. I know that with our war on terrorism that discretion needs to be used when deciding to make a balloon bomb. Please don’t be foolish like the guy who was at the airport eating a Popsicle. When he finished he held up the Popsicle stick and said to his buddies, “Look, it’s a stick up!”
Bomb
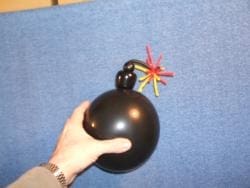
To make the classic black round bomb you will need a 9″ black round balloon, a black #260 (the fuse) and three #160 balloons (two red and one yellow) that will become the flame. Inflate the round balloon to about 7 inches and tie the knot close the balloon. Take the black #260 and inflate a 1-1/2″ bubble at the nozzle end and tie it off. Poke the nozzle of the round balloon into the knot of the #260 and apple twist it. This maneuver is sometimes called a marriage twist or an apple connection. While keeping the black #260 balloon filled with air, cut and tie off the fuse so that it is about 4 inches long.
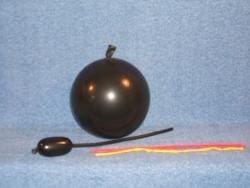
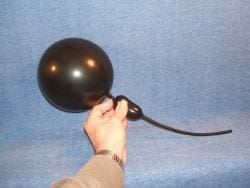
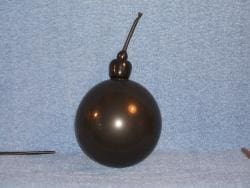
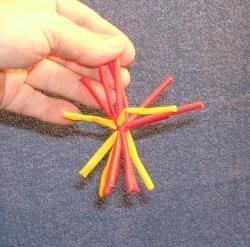
Make the flame from several uninflated #160 balloons, for example two red and one yellow ones. Cut them into thirds. Then tie one of the #160 pieces around the center of all the other pieces. Then tie the flame to the end of the fuse.
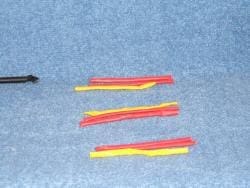
Stiffer Fuse
One of the problems with this design is the fuse. The weight of the flame causes the fuse to droop. It doesn’t have the strength to hold up the flame properly because it is only filled with air instead of being inflated. One solution is to make the flame with less pieces and that helps a little.
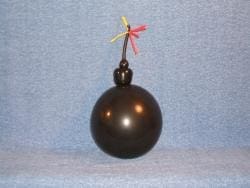
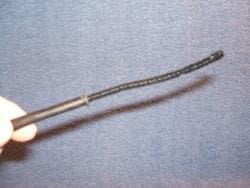
But the best way to have a stiffer fuse is to use a length of black pipe cleaner. Use pliers and bend over about a 1/4″ of the sharp end of the pipe cleaner. Then slip the pipe cleaner inside the black #260 balloon. Inflate a 1-1/2″ bubble on the nozzle end. Make sure that the end of the pipe cleaner in down inside the bubble. Apple-connect it to the round balloon just as you did before. However, with the pipe cleaner involved, it will be more awkward to accomplish.
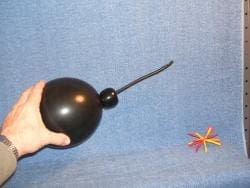
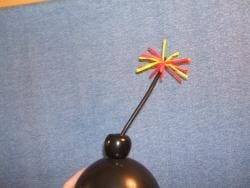
Lip Balm
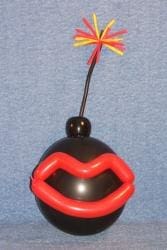
By adding some balloons lips made from a red #160 it can become a sight gag. You can attach the lips using either Elmer’s Rubber Cement or Glue Dots..
Balloon Photographing
Here are some tips to consider when you photograph your balloon creations. Find a convenient location where you can photograph your balloons. It needs to have a suitable background and with a small shelf. I use a some storage shelves. I place a flat piece of plywood on the shelf and hang my backdrop towel over it. In addition to the normal overhead lighting in the room, you will also need light sources aimed toward the balloon subject from both the left and right sides.
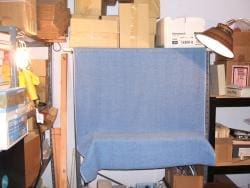
Position them about 45 degrees to the subject. The side lighting should be arrangement so that it cancels out most of the shadows. You can use floor lamps, automotive drop lights or other sources. Diffused soft lighting is the best so pick bulbs which are frosted. When I need even more diffused lighting, I sometimes place a white cloth in front of the lamp (like a handkerchief) or tape a piece of typewriter paper in front of the light. But be careful that the cloth or paper isn’t so close to the bulb that it heats up and catches on fire or scorches. You may need a tripod or other method to steady the camera. If your balloons are relatively small you may want to buy a mini-studio kit like the Digital Concepts brand. Notice in the photo that it has three diffuser screens (top, left and right) made from a sheer fabric.
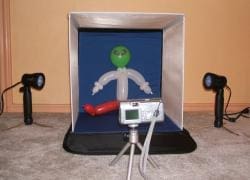
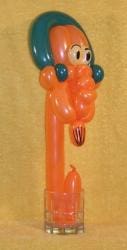
If your photos have harsh shadows, it will make it difficult to discern the details. So if your balloon subject is right up against the backdrop, your photograph could easily have shadows. Try readjusting the position of the side lighting in order to cancel out the shadows. Or you may need to find a way to hold the balloon so that it is several inches away from the background. For example, if I’m photographing just the head of a balloon caricature and it has a long neck, I fold the end of the neck balloon and stuff it into a drinking glass in order to hold it upright and away from the backdrop.
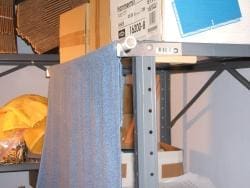
I use a beach towel as my background. I have modified it to fit on a rod by sewing one end so it has a tunnel. Then I slip the rod through it and I can hang the background in front of the shelves on some hooks. By hanging the towel with a straight rod, it keeps the towel from having wrinkles. Actually I have two towels, one goldenrod and one blue. When the balloon is dark I use the goldenrod for contrast. When the balloon is light, I use the darker blue one to get contrast. The towel’s texture is interesting and it doesn’t reflect the flash or any other light sources.
From time to time I have noticed that the quality of the photos submitted to Balloon HQ by twisters is not all that great. Here are some tips. Don’t photograph your balloon sculpture in front of a sink full of dishes. If you are proud of your creation and want to show it to the world, do it justice by choosing a good background. A busy background makes it difficult to distinguish the balloon from other things. And if you take pictures in a dark room and the balloon contains dark or black colors, it won’t show up very well.
When shooting in a dark room, use a flash. But remember that a flash can only work well if the subject is 10 feet or less from the camera. A distance of about three to five feet away is about right.
Don’t use a flash when you are only a few inches away from the balloon. The intensity of the flash will wash out the details. Be watchful of where the flash will show up on your creation. There are times the flash reflection will obliterate one of the balloon’s eyes or some other detail and thus make it look weird. In cases like that, move to one side slightly. Or you can back away so you are about five feet from the balloon, then zoom in and use your flash.
Sometimes coins or small weights can be added to your balloons so that they will stand up or stay in position. At other times you can use double-stick tape between the balloon and the backdrop towel to hold your balloon up. Of course that may causes some shadows, but by positioning the light source, the shadows can be minimized.
Software
But what about photos that have already been taken? If you have the proper software, it is possible to do some enhancing or editing of your photos. I’ve taken balloon photos when I attended a convention, then when I got home found out that people had the “Red Eye” or that some of the pictures turned out too dark. One brand of free software that you can use is called Irfanview (http://www.irfanview.com/) which offers a lot of features. In addition to brightening photographs, it allows you to easily crop your photos and even create panoramic photos. You may not be a professional photographer, but with a little bit of planning your photos can be improved.