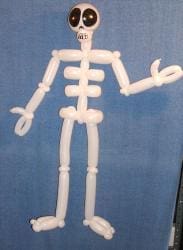
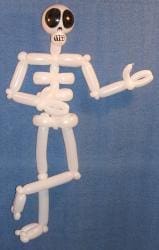
Skeleton
by Ralph Dewey
The Balloon HQ challenge this month is a skeleton.
Halloween is coming up soon and skeletons are always popular decorations. I came up with this design that I thought looked fairly good and yet was not too difficult to make. So our sculpture project for this month is a half-scale skeleton which stands about 3 feet tall. To make the skeleton, we will need some white #260 balloons and some white #160 balloons. For the skull, we can use either a white 9″ round balloon or a white 6″ Betallic Link-O-Loon.
Upper Spine
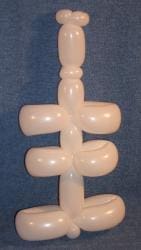
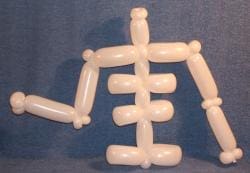
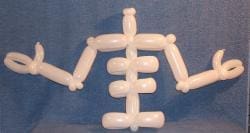
Fully inflate a white #260 except for about 4 inches and tie off. Twist off two 1″ bubble and ear twist (pinch twist) them. This is where the skull will attach to the spine. Twist off a 2-1/2″ bubble for the neck. Twist off two 3/4″ bubble and ear twist them. This is the location where the shoulders will be connected. Twist off a 2″ bubble and two soft 6″ bubbles. Fold-twist both 6″ bubbles to be the first set of ribs. Twist off a 2″ bubble and two soft 4-1/2″ bubbles. Fold-twist both 4-1/2″ bubbles to be the second set of ribs. Tie off the balloon, discard any remaining balloon.
Lower Spine & Hips
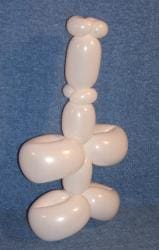
Inflate another white #260 balloon to about half full and tie off the nozzle. Twist off a 3″ bubble (the lower spine) a 1-1/2″ bubble and two 7″ bubbles. Ear-twist the 1-1/2″ bubble. Fold-twist the two 7″ bubbles to be the hips. The 1-1/2″ bubble should be positioned at the bottom and between the hips.
Shoulders & Arms
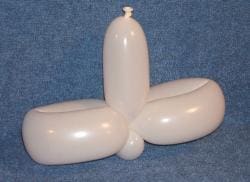
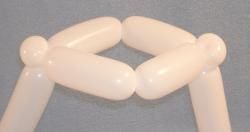
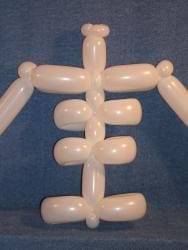
The shoulders/arms are made by overlapping two separate #260 balloons. To do so, inflate two white #260 balloons fully except for 3″ and tie off their nozzles. On one balloon, twist off a 1-1/2″ bubble and ear twist it. Twist off two 4″ bubbles. Twist off the same bubbles on the second white #260 balloon. Overlap both balloons and twist them together. Connect the center of the shoulders to the two 3/4″ ear twists on the upper spine. Position the ear twists vertically (up and down). Both arms are made in the same way. To make one, twist off a 5″ bubble and two 1″ bubbles. Ear-twist the two 1″ bubbles for the elbow. Twist off a 5″ bubble and two 1-1/2″ bubbles. Ear-twist the two 1-1/2″ bubbles to become the wrists. Cut off and discard any remaining balloon. The second arm is made the same way.
Fingers
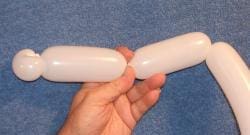
Make the fingers from a half inflated white #160 balloon. Twist off a 3″ bubble and two 4″ bubbles. Tie the two 4″ bubbles end to end. Twist-connect them in between the two wrist bubbles. Curve the 3″ bubble to be the thumb. Make the fingers for the other hand the same way.
Legs
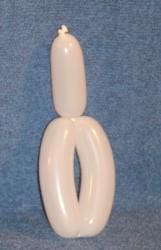
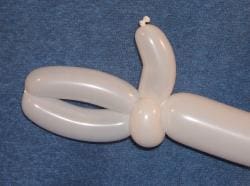
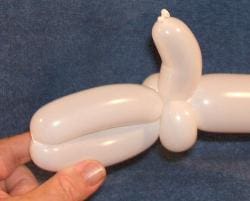
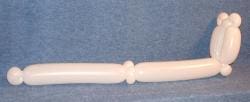
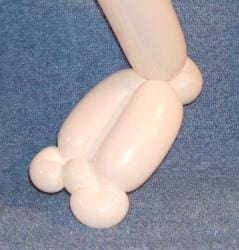
Each leg is made from a single white #260 balloon. Fully inflate the balloon except for about 3″ inches and tie off the nozzle. Twist off a 1-1/2″ bubble (the hip joint) and ear twist it. Twist off a 9″ bubble (the upper thigh) and two 1″ bubbles. Ear-twist the two 1″ bubbles to become the knee. Twist off a 9″ bubble as the lower leg. Now make the foot. Twist off a 1-1/2″ bubble (the heel) and ear twist it. Twist off bubbles in this order, 3″, 1″, 3/4″, 3/4″ and 3″. Twist-connect the series of bubbles. Tie and discard any excess balloon. Ear-twist the 1″ bubble (big toe) and the last 3/4″ bubble. Now make the second leg in the same manner. To connect the legs, push the first1-1/2″ (the hip joint) into the two folded 7″ hip bubbles.
Skull
Inflate a white Betallic 6″ Link-O-Loon to about 5-1/2″ and tie off the balloon leaving a long nozzle. Squeeze the balloon so there is a 3″ bubble near the nozzle and twist it off. Tie the nozzle and the nipple ends together. Decorate the face with a black marker such as a Sharpie. Attach the back of the skull to the two ear twists at the top of the spine.
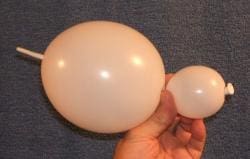
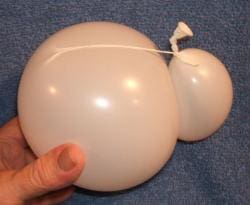
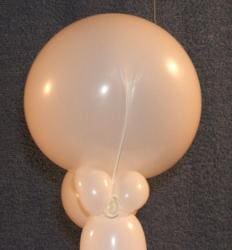
By the way, if you don’t have a Link-O-Loon, the skull can also be made from a 9″ round balloons by using a raisin twist. You have to tie the nozzle to the raisin twist to get the same look. Posing the skeleton. By using two ear twists at the elbows and knees, you can pose it easily into different positions. Notice examples in the following photos.
